Understanding the purchasing options and timing for establishing your colony will help to make you a successful beekeeper.
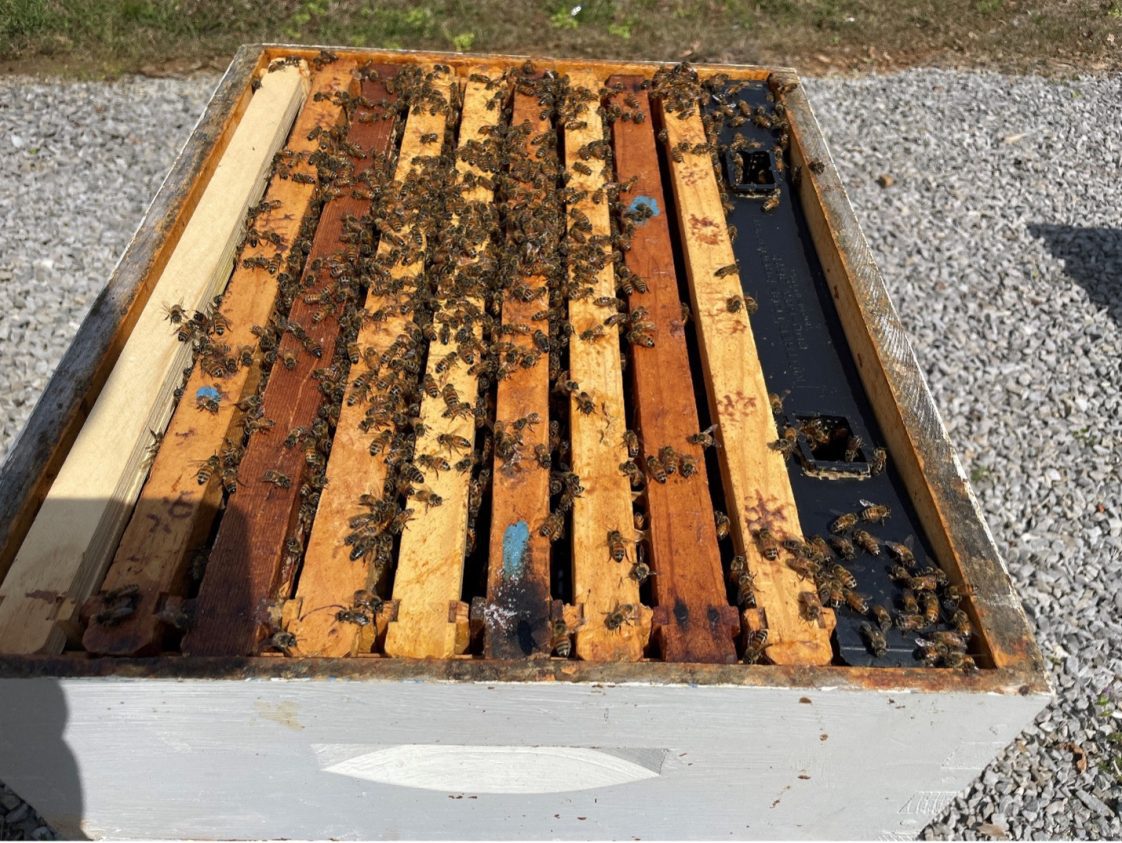
Establishing a honey bee colony can confuse new beekeepers (see Figure 1). Understanding the purchasing options and timing for establishing your colony is important in creating a healthy, strong colony. Strong colonies can better withstand pest and disease pressures better and are more resilient against extreme winter temperatures.
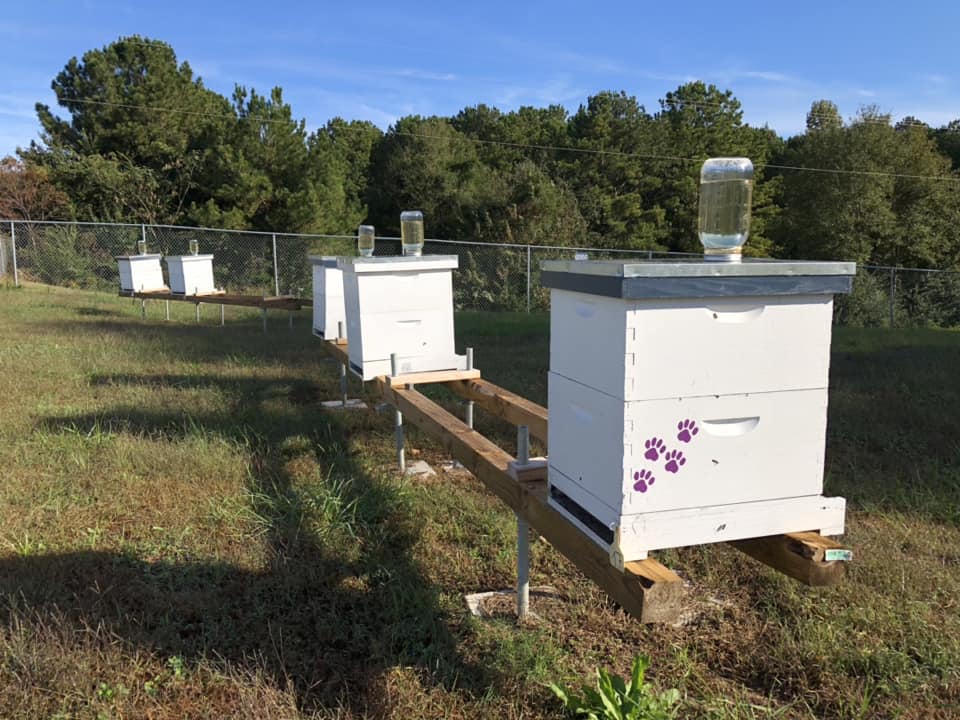
Figure 1. Newly established hives (Photo Credit: Allyson Shabel).
There are many breeds or races of honey bees available to beekeepers in Alabama. Some common honey bee breeds include Italian, Russian, Carniolan, Caucasian, Buckfast, and Varroa Sensitive Hygiene (VSH). Each breed has distinct attributes that make it desirable. Some attributes include honey production rates, defensive behaviors, overwintering potential, swarming tendency, varroa mite resistance, propolis production, and spring brood build-up rates. While some beekeepers select their breed based on specific qualities vital to their apiary, it is a good idea for beginners to start with a breed that is moderate in many of these attributes.
The Italian honey bee is a suitable breed for beginner beekeepers. It is a relatively gentle breed that displays minimal defensive behaviors. It is known to overwinter well and build up brood populations early in the spring, which leads to a large population of foragers who can collect nectar during the main nectar flow.
It is crucial to place your orders early in the season. Plan on placing orders in November or December for delivery the following spring. Suppliers may have limited quantities of packages or nucs, and those who place orders late may find the supply is limited or end up with an inferior product. Many suppliers may require a deposit to secure the order.
There are numerous outlets for purchasing honey bees. Equipment suppliers often sell honey bees. Local beekeepers may even sell bees from their apiaries.
Additionally, many local clubs place large orders for delivery to club members. This reduces shipping costs and helps provide new beekeepers with a trusted source for bees. It may also help new beekeepers by providing a large local group of beekeepers who are all on the same production schedule. New beekeepers will more easily be able to gauge their success by comparing more efficiently their colonies to others who received bees in the same shipment.
There are three main options for beginner beekeepers looking to establish a colony: package bees, nucleus colonies, or existing hives. Each option has advantages and disadvantages. Installation timing and procedure also vary with each option.
A package of honey bees is the least expensive way to establish a new colony. At approximately $150 per package, it comes with a 3-pound box of worker bees and one young, mated queen housed in a separate queen cage. A container of sugar syrup inside the package supplies the honey bees with food while in transit. It comes without any additional equipment or drawn comb and the queen has not yet started laying eggs. When the package of bees arrives, the beekeeper installs the workers and queen in a brood box with frames of foundation or, if available, drawn comb. Once enough comb is built, the queen will begin laying eggs.
Because the package is installed into a hive without any eggs, brood, or stored honey, they are slightly more likely to abandon the hive box in favor of a new home. The danger of abandoning the hive generally subsides when the queen begins laying eggs and there are food stores and brood present.
While package bees are the least expensive way to purchase bees and have the lowest potential for disease and pest pressure, there are some disadvantages to beginning with package bees. Because package bees are installed into a hive without any comb, they must draw out all the comb needed for that year. Drawing out comb requires abundant energy, which is obtained from consuming what would otherwise be turned into stored honey. Therefore, any honey produced is typically left for the bee’s winter stores instead of being extracted for the beekeeper. When resources are used to build comb instead of storing honey, colonies formed with a package of bees are more likely to perish from starvation in their first year. The beekeeper must actively manage and feed package bees in the first year to ensure starvation does not occur.
Request that package bees be delivered from mid-March through April in Alabama. Honey bee packages should be installed before the spring nectar flow or early into the spring nectar flow.
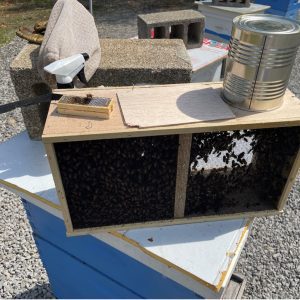 Figure 2. Package with queen cage and syrup can removed. (Photo Credit: Allyson Shabel)
  Figure 3. Remove the cork from candy end of the queen cage. (Photo Credit: Allyson Shabel)
 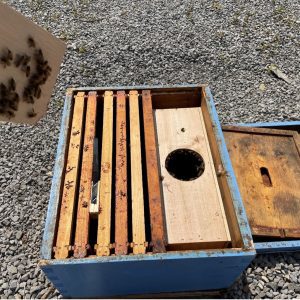 Figure 4. Package and queen cage in a brood box ready to put the lid on. (Photo Credit: Allyson Shabel)
 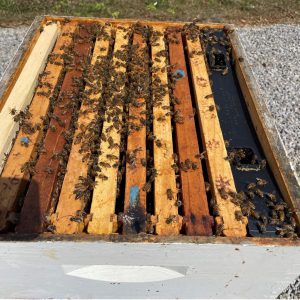 Figure 5. Package box and queen cage removed, additional frames and feeder in place. (Photo Credit: Allyson Shabel)
A nucleus colony, or nuc, is a small, established colony. It has five frames with a drawn-out comb, a laying queen, two frames of food stores, and two to three frames of brood. The nuc can provide a jump start on your colony’s first year because it is already established and productive when it arrives.
A nuc costs approximately $200 and must be purchased and picked up from a supplier within Alabama. Before buying a nuc, ask to perform an inspection. Look for a productive, laying queen, plenty of healthy brood and adult bees, and signs of overall colony health. Nucs created the previous summer or fall are superior to those created in the early spring before purchase. In Alabama, request nuc pickup from mid-March through early May.
Nucs will build up more quickly than package bees. By the end of the first year, a healthy nuc will fill out two hive boxes with wax, brood, and honey. Because the nuc was an already established colony at the time of purchase, it will be stronger and more winter-hardy by the end of the first year than a colony built with package bees. One disadvantage of a nuc is that the disease and pest pressure may be higher than with a package of bees. Make sure to ask about Varroa treatment history and consider sampling for Varroa about a month after installation.
Another method of establishing a colony is by purchasing an existing hive. An existing hive will cost approximately $300 and will consist of a bottom board, one brood box with frames of drawn comb, an inner cover, and a telescoping lid. When selling an existing hive, many beekeepers will ask the purchaser to send over their hive parts and they will install them into the purchaser’s equipment to save on costs.
If purchasing an existing hive, ask to perform a hive inspection before purchasing. An existing hive should contain five to six frames of brood in various stages, and two to three frames of food. The comb should be freshly drawn, the queen should be productive, and there should be plenty of worker bees and brood present. The hive should exhibit signs of overall health; there should not be any signs of pests or diseases. Request information from the beekeeper about any history of diseases, especially foulbrood. Ask about Varroa mite populations and treatment history.
One advantage of an existing hive is that it can be purchased at any time of the year. Ideally, purchase them in the fall and receive them in early April to take advantage of the spring nectar flow. Existing hives can only be purchased and moved within Alabama. Some disadvantages include high prices and higher potential disease and pest pressure on the hive as compared to the other establishment options.
An established small hive with a laying queen and bees that have accepted their queen. The nuc consists of 1-2 frames of honey and pollen, 2-3 frames of brood, and one frame with comb only.
A top and bottom board, a deep brood box, a laying queen, and workers. The established hive consists of 10 frames filled with brood, honey, and pollen.
Alabama Department of Agriculture and Industries (ADAI) Apiary Protection Unit was established to help support beekeepers and the beekeeping industry in Alabama. The No Comb Law (Section 2-14-4) which states that honey bees may not enter the state of Alabama on comb, was enacted to prevent the spread of diseases. Therefore, nucs and existing colonies may only be purchased from within Alabama. Because package bees are shipped without any comb, they can be purchased from within Alabama or across state lines.
Additionally, ADAI regulations state that each apiary must be registered annually (Section 2-14-3) by October 1 for a nominal fee. Your hive can be registered at www.aces.edu/go/ApiaryReg.
There are many options to choose from when deciding how to establish your apiary. Each option has advantages and disadvantages, and the timing for each is critical to creating a successful apiary that will withstand pests, disease, and winter weather. Whether you choose package bees, a nuc, or an existing hive, depends on your budget, time frame, and the availability in your area.

Allyson Shabel, Urban Regional Extension Agent, Alabama A&M University and William Rowe, Regional Extension Agent, Auburn University.
New April 2024, Establishing a Honey Bee Colony, UNP-2197